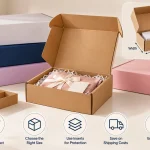
A customer sees your cardboard box first, but the packaging experience continues when they open it. The paper inside can carry the same colors, logo, and visual style as the outer carton, making the complete package feel carefully planned.
Custom wax paper and cardboard boxes can work together when each component has a clear purpose. The box provides structure and space for essential information. The paper can serve as a suitable wrap or liner while adding another layer of branding. The best result starts with the product, rather than a printed pattern. You need to decide whether wax paper is appropriate for the intended use, how much paper each package needs, and how the wrapped product fits inside the box. This guide explains how to plan both components as one packaging system.
Before choosing colors or printing, decide what each packaging component needs to do. The cardboard box might hold a retail product, organize several items, or present a takeaway order. The paper might line the base, wrap an item, or separate the contents from the outer carton. These roles affect material selection, dimensions, and the packing process. A sheet used as a simple liner needs a different layout from one that folds around the product. Start with the intended use of your custom cardboard boxes. Record what goes inside, how customers receive the package, and which surfaces they see before and after opening. A clear purpose helps you avoid adding layers that make packing slower without improving the finished package.

Wax paper, greaseproof paper, parchment, and tissue paper are different materials. A similar appearance does not mean they perform the same way. Describe the product and its conditions to your supplier. For food, this includes whether the item is dry, oily, moist, warm, or chilled, along with the expected contact time. Ask the supplier to confirm the suitability of the complete printed sheet for the intended application, including its coating and printing. Do not assume that a paper is appropriate for direct food contact simply because it is called packaging paper. Review the available custom packaging papers around the actual requirement. If another paper suits the product better, make that decision before developing the final artwork.Material suitability should lead the design process.
A box that fits an unwrapped item may become too tight once the paper is added. Measure the product in its final packed condition. Include folded paper, inserts, accessories, and any other items that sit inside the carton. Pay attention to areas where the paper overlaps. Several folds underneath a product can increase the height of the packed item, while tucked edges can reduce usable space along the sides. For a multi-item package, check whether each item needs its own wrap or whether one liner is sufficient. Individual wrapping may change both the required box size and the time needed to pack an order. Approve the fit using the complete package, rather than reviewing the box and paper separately.
The right sheet size depends on how the paper will be used. A liner should cover the intended surface without creating unnecessary bunching. A wrapping sheet needs enough material to follow the selected folding method and provide the required overlap. Ask your packing team to test the proposed sheet with the actual product. Check whether they can position and fold it consistently without trimming each sheet by hand. Avoid choosing an oversized sheet only because it appears more generous. Extra material may hide the product, interfere with closing, or create an untidy opening experience. Once the fold works, record the sheet dimensions and packing method. This gives the supplier and your team a clear reference for future orders.
The paper and box do not need identical artwork to look coordinated. Choose a small set of shared elements, such as a primary color, typeface, logo, or simple graphic. Then decide how those elements appear on each surface. For example, the outer box could feature one large logo and clear product information. The paper could use a smaller repeating mark with more open space. Another approach is a natural brown carton paired with a light sheet carrying a restrained one-color pattern. If you are considering custom kraft boxes, review the print against the actual brown surface before approving the palette. Consistency comes from recognizable design choices, rather than printing every surface heavily.
A repeating pattern needs to work after the paper is folded. A large logo placed in the middle of the sheet might disappear underneath the product. A pattern with tightly packed text may become difficult to read where folds overlap.
Test the repeat size and spacing with a folded mockup. Look at the sheet when it is flat, partly wrapped, and placed inside the box. Simple symbols or short brand marks often give the design more flexibility than long messages repeated across the sheet. Keep important instructions on a surface where customers can reliably find them. Also review the printed side and packing orientation. Your team should know which way the sheet faces and how to fold it consistently.
The same artwork can look different on a cardboard box and a coated paper sheet. Surface color, texture, coating, and printing method can affect the appearance of the finished design. A digital preview is useful for layout, but it cannot show every material difference. Provide clear color references and ask what proofing options are available for both components. Review physical examples together when color consistency matters. Aim for an agreed visual relationship between the materials. Do not assume that identical digital color values will produce an identical appearance on every surface. Record the approved references so future orders can be checked against the same standard.
Use the outer box to establish a clear information hierarchy. Customers should be able to identify the brand, product, and variant without searching through decorative graphics. Leave suitable space for any required labels, instructions, or other essential information. The paper can support the visual identity, but folded paper is an unreliable place for information that must remain readable. For food packaging, consider how the liner sits inside the carton and whether it covers any information customers need to see. Review custom food packaging around the complete serving or takeaway arrangement. Check the package both open and closed. Each view should make sense on its own.
An attractive mockup is only part of the approval process. Have someone pack several representative products using the proposed box and paper. Watch for steps that require extra adjustment, trimming, or repeated folding. Check whether the paper catches in the closure, whether the product moves, and whether the box keeps its intended shape. For takeaway products, assess the package under the expected serving conditions. For shipped goods, review it with the required outer packaging and protective components. A decorative wrap should not be treated as a substitute for an insert, cushioning, or a suitable shipping container. Each part of the package should be assessed for its own role.
One box does not always require one paper sheet. A package containing several separately wrapped items may use multiple sheets. Another package may need a liner and an additional wrap. Estimate paper demand using the number of sheets required per finished package. Include a reasonable allowance based on your actual packing process, rather than an arbitrary percentage. Keep quantities separated by box size, sheet size, and artwork version. Ask your supplier to clarify minimum quantities and pricing for each component. Also consider storage and future design changes. A large stock of printed packaging can become difficult to use if product information or branding changes soon afterward.
Keep the final decisions in one document so both components follow the same brief.
| Packaging detail | What to confirm |
|---|---|
| Product | Dimensions, weight, condition, and intended use |
| Paper | Suitable material, coating, print, and contact application |
| Sheet size | Coverage, folding method, and overlap |
| Box | Internal dimensions, structure, and closure |
| Branding | Shared colors, logo treatment, and pattern spacing |
| Artwork | Correct templates, orientation, and essential information |
| Sample | Wrapped-product fit and practical packing checks |
| Quantities | Boxes and sheets required for each version |
| Delivery | Destination and agreed schedule for both components |
If you change the product, paper, fold, or box size after approval, check whether the complete sample needs another review.

A useful enquiry includes product details, box dimensions, paper application, proposed sheet size, artwork, quantities, and the required delivery date. Add photographs or a simple packing demonstration if they help explain how the components should work together. WOW Custom Boxes provides custom packaging options that you can discuss around your product and presentation requirements. Use the brief to keep the project focused on the finished package. When your requirements are ready, contact the packaging team to review material suitability, printing, quotation details, and sample options before production.
It can be used as a printed wrap or liner where the specified material suits the product and conditions. Its suitability should be confirmed before ordering.
Yes. They can share colors, logos, and graphic elements while using different layouts suited to each surface.
Yes. Paper folds and overlaps can change the packed dimensions. Check the box using the finished wrapped product.
Test the intended lining or wrapping method with the actual product. Choose a size that provides the required coverage without unnecessary bunching or trimming.
Yes. Review the repeat size and spacing on a folded sample so the design remains recognizable when the paper is used.