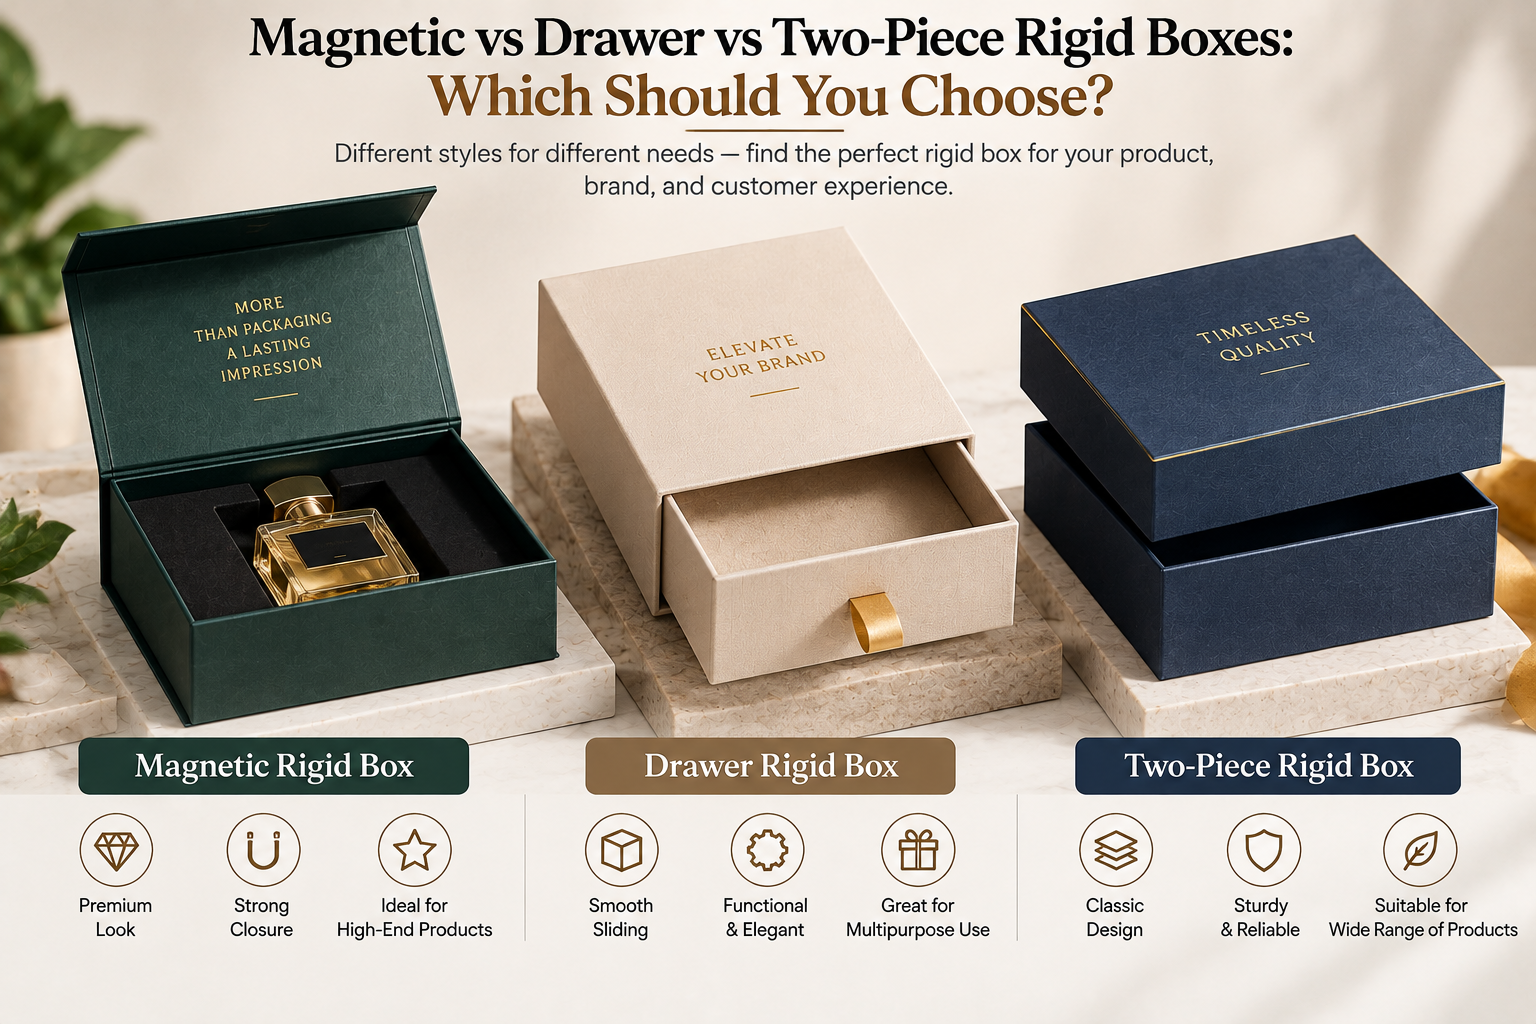
Magnetic, drawer, and two-piece rigid boxes can all create a premium product presentation, but they solve different packing problems. Choose a magnetic closure when the opening motion and hinged presentation matter. Choose a drawer box when you want the product to slide into view in a controlled way. Choose a two-piece lid and base when you want straightforward access from above. The final decision should come from a packed-product sample: the item must fit, stay in place, and be easy to remove.
If you are shopping for custom rigid boxes, decide on the opening style before selecting artwork. A good-looking mockup cannot show whether an insert blocks the lid, whether the drawer catches on a ribbon, or whether a customer can remove the product comfortably. This guide compares the three constructions using those practical questions.
| Rigid box style | How it opens | Often useful for | Check on your sample |
| Magnetic closure | A hinged flap opens from the front or side | Gift sets and presentations where the lid stays attached | Lid clearance, closure alignment, and insert height |
| Drawer | An inner tray slides out of an outer sleeve | Compact sets and a staged product reveal | Pull access, tray friction, and item movement |
| Two-piece lid and base | A separate lid lifts away from the base | Products best viewed or removed from above | Lid fit, lift-off space, and product access |
These are starting points, not fixed product rules. The same perfume set, for example, might work in more than one style if the dimensions, insert, and packing method are designed around it.
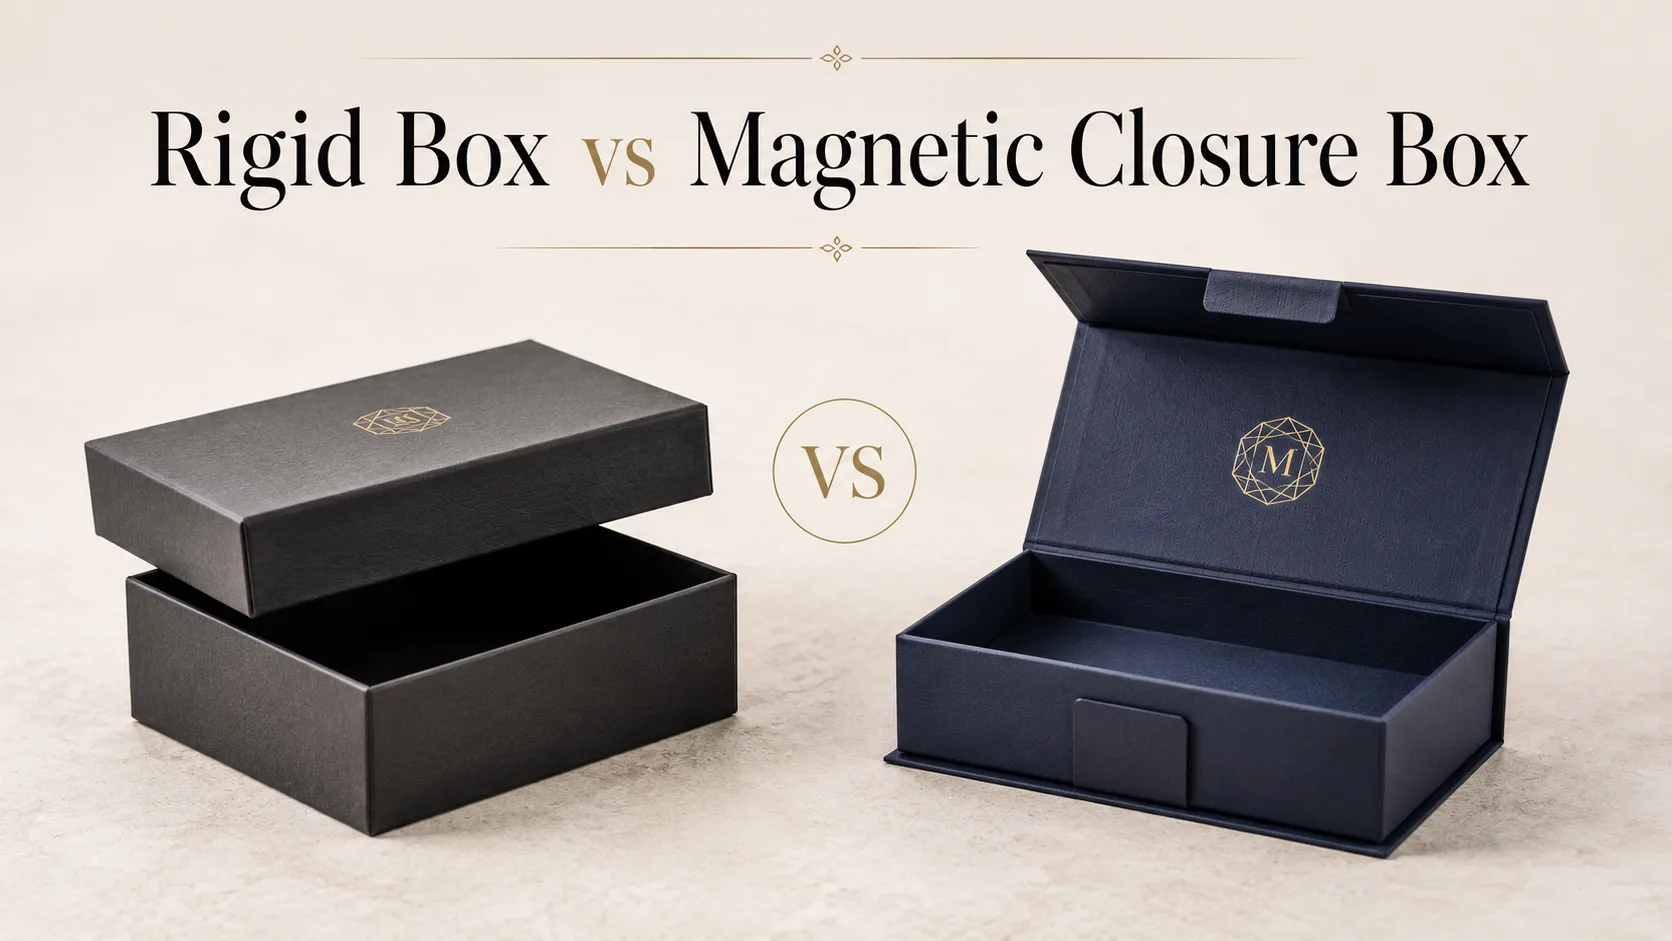
A magnetic closure box opens like a book or hinged presentation case. The lid stays connected to the base, so the customer does not need to put a loose lid down before seeing the contents. This can work well for a gift set with several components, a presentation sample, or a product that benefits from interior printing on the lid.
The mechanism is only one part of the experience. The lid needs room to swing open, and its edge should align with the front of the box when closed. If the insert sits too high, the product can press against the lid even when the magnets appear to meet. If an accessory sits near the hinge, check that it does not obstruct opening. Review magnetic closure rigid boxes with your actual product layout in mind rather than choosing from an empty-box photo alone.
Place the packed sample on a table and open it the way a customer would. Can the lid remain open without making the product hard to reach? Are instructions, tissue, or a printed card covering the main item? Close and reopen it several times, checking that the box looks neat after normal handling. Those observations are more useful than a digital rendering of the front panel.
In a drawer box, an inner tray slides out of a surrounding sleeve. The movement creates a deliberate reveal and can keep a compact product grouped with its accessories. The outer sleeve offers a broad area for branding, while the tray presents the product once the customer pulls it open.
That effect depends on a smooth pull. A tray that sticks feels awkward; a tray that moves too freely may expose the product before the customer intends to open it. If you use a ribbon pull, leave enough accessible ribbon for a person to grip it. Test the tray with the real insert and product weight, since an empty prototype will not behave exactly like a packed order. The rigid drawer boxes range shows the format, but your sample must confirm the fit.
A drawer may be less convenient when an item must be lifted straight up, or when a tall product makes the tray difficult to slide. For a multi-item gift, position the items so nothing catches on the sleeve as the tray moves. Check the full movement from closed to fully open, including whether the tray remains supported at the end of the pull.
The familiar two-piece construction has a separate lid that lifts off a base. It can be a sensible choice when a product looks best from above, when an insert needs open access during packing, or when the recipient should see the whole arrangement at once. The lid itself can carry the main exterior design while the base holds the product.
Pay attention to how the lid releases. If it grips too tightly, the customer may shake the base while trying to remove it. If it sits too loosely, the closed presentation may feel insecure. Test both the lid depth and the ease of lifting it with the finished wrap or print applied. See the two-piece lid rigid boxes option if your item needs simple top access.
Also plan for the loose lid after opening. For a gift opened on a small table, that detail affects the experience. If your product instructions or message will be printed inside the lid, check whether the customer will naturally see that panel when the lid is removed.
Put the product together exactly as it will be sold. Include its protective wrap, accessories, booklet, and any retail container. Measure length, width, and height at the widest points. If the item varies by size, measure the largest version and then test the smallest one for excessive movement. Tell the supplier whether your measurements describe the bare product or the complete packed set.
Ask for the box’s usable inside dimensions. The outside measurements will be larger because the walls and wrapped construction take up space. Do not approve a size merely because the product dimensions appear smaller than the outside of the box. For a drawer design, remember that the inner tray must also fit into its sleeve. For a magnetic design, account for the lid and hinge. For a two-piece design, leave enough room to remove the lid without disturbing the item.
After sizing, think about handling. Someone has to place the product in the box consistently, close it, and potentially add an outer shipping carton. If packing one unit takes too much adjustment, a design that looks attractive in a prototype may become frustrating across a larger order.
An insert can separate items, keep them aligned, and show each component in an intended position. It may also help limit movement, depending on its material and design. Begin with the product layout: which side faces up, what should be visible first, and how can the customer lift the item without pulling on a fragile part?
Different openings place different demands on an insert. A magnetic lid must close over it. A drawer tray needs clearance as it slides through the sleeve. A two-piece lid should lift off without dragging the insert upward. Test the complete assembled design, especially if you are considering rigid boxes with insert for a fragile or multi-part product.
Ask for a sample with the intended insert, not just a sample of the empty outer box. Put the actual product into the recess and lift it out several times. The product should be held securely but remain easy to remove. If a person needs a tool or has to turn the whole box upside down, revise the cutout or provide a finger access point.
Storage matters when you are ordering many boxes before a launch. Ask how the proposed design will arrive and how much room the shipment will occupy in your workspace. Some businesses may want to compare a standard setup construction with a foldable alternative when warehouse space is limited. If that is relevant to your operation, examine folding rigid boxes as a separate construction and test the assembled result before switching formats.
Do not decide on the basis of one quoted unit price. Request a quote for the same quantity, dimensions, artwork, insert, and finishing requirements across the styles you are comparing. Ask whether a sample, setup work, or shipping is included. That gives you a meaningful comparison without assuming one opening style is always cheaper than another.
Once you have approved the structure, plan how the exterior and interior support the product. A restrained logo may suit a box intended for repeat storage, while printed interior instructions may help with a set containing several parts. Foil or other decorative effects should be placed where folds, edges, and openings do not undermine the design. Ask to see an artwork proof for the exact dieline before the production run.
Check that the color and finish you request suit the way the box will be handled. A delicate surface may show marks on an item customers repeatedly open. Inspect a physical sample under ordinary light and after normal handling so the final finish meets your expectations beyond the first photograph.
Write down any failure you notice. A lid that presses against the item, a drawer that catches, or a base that is hard to hold can often be fixed at the sample stage. Send those observations to the supplier along with photos and measurements so the next revision addresses a specific issue.
Choose the style that lets your customer see, remove, and put away the product naturally while keeping it secure in the packed box. Magnetic closures suit a hinged presentation; drawers suit a sliding reveal; two-piece boxes suit direct access from above. Compare the three using the same product and packing contents, then approve the sample that works in real use.
If you already know the product dimensions and intended order quantity, send them through the Contact Us page. Include the product layout and mention the opening styles you want to compare so the discussion starts with the right structure.
To explore other packaging options for your brand, visit WOW Custom Boxes.
Yes. They can present several items together when the insert keeps the contents positioned and leaves the hinged lid free to close.
Yes, if the material, tray, and sleeve are designed for that packed weight. Test a sample with the real product to confirm the drawer slides and stays supported.
Yes, when the product would otherwise move or when several components need separation. A securely fitted product may not need the same insert design as a delicate set.
Yes, if every size is tested. A revised insert may help a smaller item fit, but the largest item still needs adequate clearance and an easy removal path.
Yes. Artwork can be planned early, but approve the box structure and fit with a physical sample before committing to fina