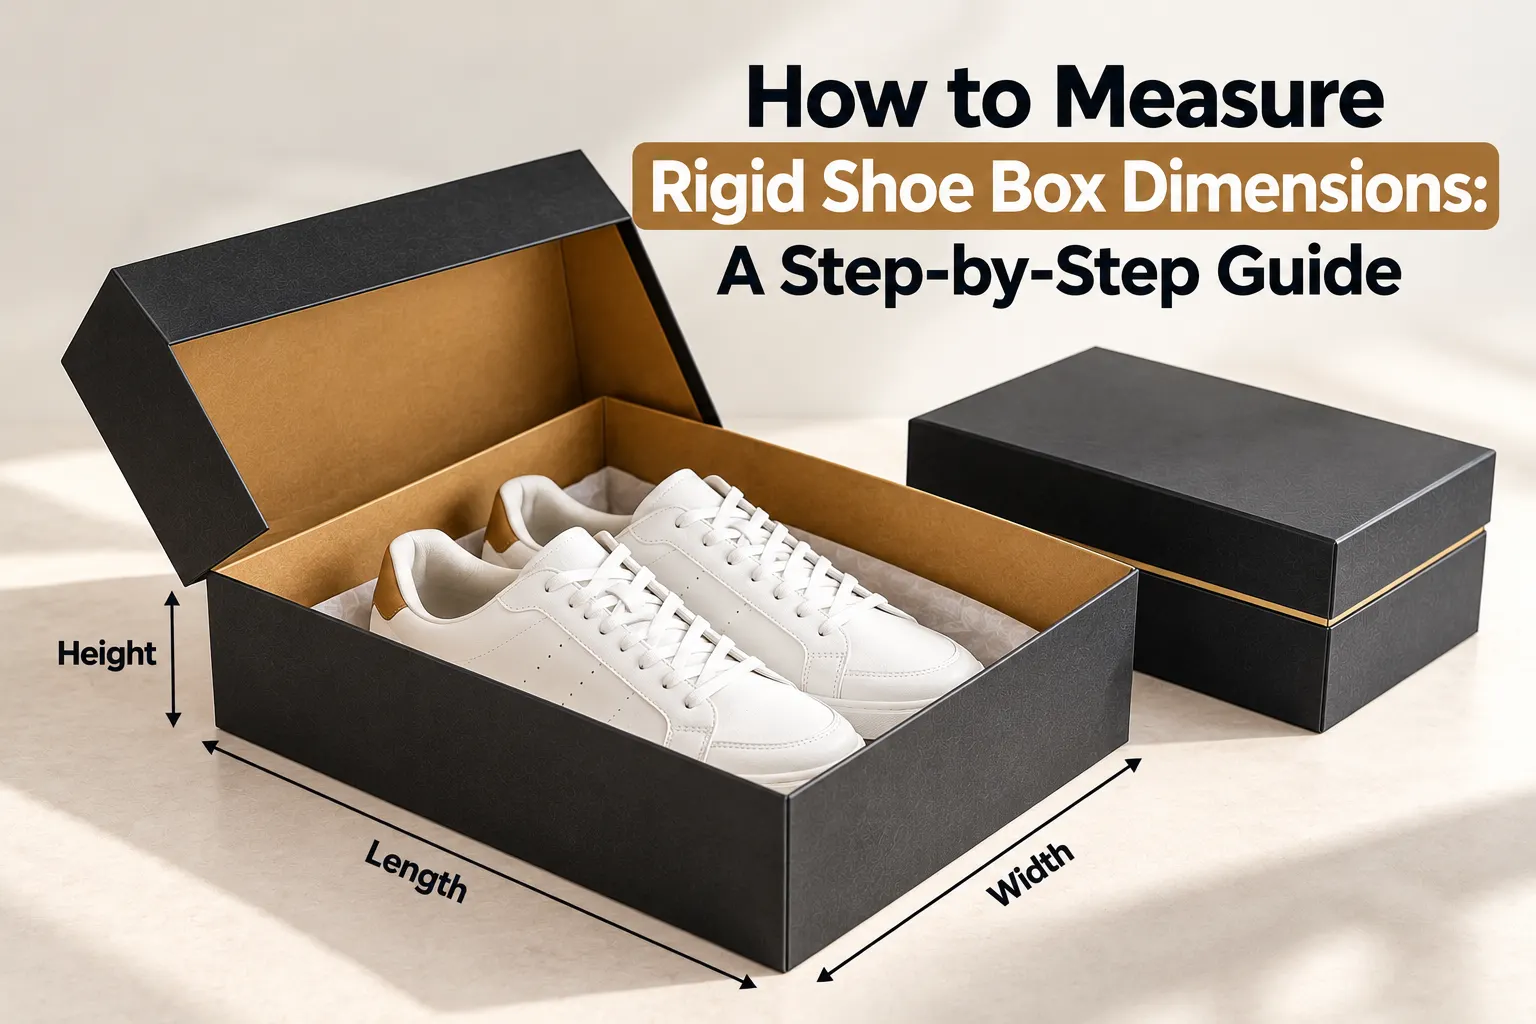
Whether you are creating packaging for sneakers, dress shoes, sandals, children’s footwear, or another shoe style, the measurement process should begin with the product itself. The shoe length, width, height, pair arrangement, tissue, accessories, and desired opening style can all affect the final box dimensions. This step-by-step guide explains how to measure your shoes and turn those measurements into a practical rigid box specification.
Rigid shoe boxes are built around a firm structure, so their internal space needs to be planned carefully before production. Unlike a flexible package that may provide some movement, a rigid box is expected to maintain its shape and provide a defined space for the footwear.
Accurate dimensions help control product fit, internal clearance, box proportions, insert placement, lid movement, and overall presentation. They can also make the packaging easier to store and handle because the finished box is based on the real product rather than an estimated size.
If you are comparing custom box dimensions, always start by measuring the shoes in the condition in which they will actually be packed. This creates a more reliable starting point for the final packaging specification.
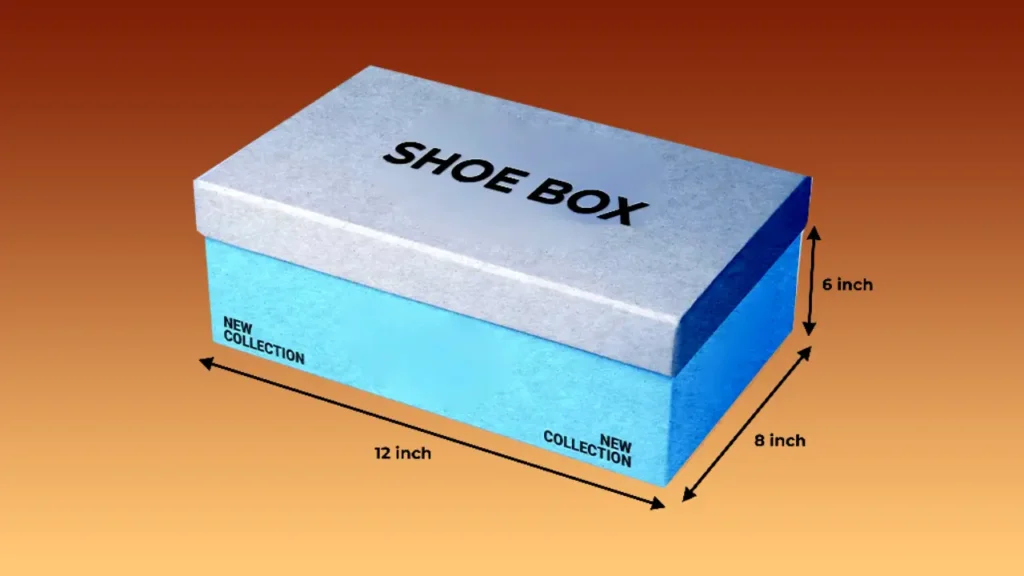
The basic measurements are length, width, and height. However, shoe packaging requires more than simply measuring one point on the footwear. Shoes can have curved soles, raised heels, wide sections, high collars, thick padding, or decorative components that affect the amount of space required.
| Measurement | What to Measure | Why It Matters |
|---|---|---|
| Length | Longest point from heel to toe | Determines the required internal box length |
| Width | Widest part of the shoe | Controls internal side-to-side space |
| Height | Highest point of the packed shoe | Determines box depth and lid clearance |
| Pair Arrangement | How both shoes will sit together | Determines the overall internal layout |
| Accessories | Tissue, cards, laces, or other items | Ensures all contents fit inside the box |
Place the shoe on a flat surface and measure from the furthest point at the heel to the furthest point at the toe. Measure the actual shoe rather than relying on the printed shoe size because different footwear designs can have different physical dimensions even when they share the same numerical size.
For pointed shoes, boots, sneakers with thick soles, or shoes with extended toe designs, measure the complete physical length. Do not stop at the main upper section if the sole extends farther.
Measure both shoes when possible. The pair may not be perfectly identical in shape, especially when one shoe contains a different accessory or structural feature. Use the larger relevant measurement when establishing the internal length.
Next, determine the widest section of the shoe. This is usually around the forefoot, but the widest point can change depending on the footwear design. Boots, fashion shoes, sneakers, and children’s footwear may all have different width profiles.
Place a ruler or measuring tool across the widest section without compressing the shoe. If the footwear contains soft materials that can change shape, measure it in the condition in which it will normally be packed.
The width measurement is important because a box can have enough length while still being too narrow. If both shoes are placed side by side, measure the complete pair arrangement rather than using the width of one shoe alone.
Measure from the bottom of the sole to the highest point of the shoe. Pay particular attention to high-top sneakers, boots, shoes with raised collars, decorative components, and footwear that will be packed with tissue or other materials.
The highest point should be measured without compressing the product. If the footwear will be arranged at an angle, record the intended orientation because the required internal height can change according to how the pair is positioned.
For larger or more structured footwear, this measurement becomes especially important because insufficient vertical clearance can affect lid closure and the overall appearance of the package.
A common mistake is measuring only one shoe and assuming the pair will fit into the same space. The final box needs to accommodate both shoes in their actual packing position.
Decide whether the shoes will sit side by side, heel-to-toe, slightly angled, or in another arrangement. Then measure the combined footprint of that arrangement. Include the widest points and the total occupied space rather than adding individual measurements without considering how the shoes overlap or sit together.
This step is particularly important for footwear with large soles, high collars, or unusual shapes. The pair arrangement should be shown to the packaging team before the final dieline is prepared.
Shoes are often packed with tissue, paper, cards, tags, laces, replacement parts, or other accessories. These items may require additional internal space, so they should be included before the final rigid shoe box dimensions are approved.
Do not add an arbitrary amount of space without considering how the package will actually be loaded. The required clearance should provide enough room for the contents to enter and leave the box while maintaining the intended presentation.
If you are reviewing Empty Shoe Box Dimensions, use the actual footwear, tissue, accessories, and packing orientation as the reference for the final size rather than relying only on a standard shoe-size chart.
When ordering rigid packaging, it is important to distinguish between internal and external dimensions. Internal dimensions describe the usable space available for the shoes, while external dimensions include the board thickness, wrapping material, walls, lid, and other structural components.
The product fit should be planned from the inside outward. Start with the footwear and determine the required internal space. The packaging structure can then be developed around that space to establish the finished external dimensions.
Using external measurements as though they were internal measurements can result in a box that does not provide enough room for the product. Always confirm which dimension is being discussed when communicating with the packaging supplier.
Rigid shoe boxes can use different construction styles, and the structure can affect the final dimensions. A traditional lid-and-base box has different dimensional requirements from a drawer-style box or another specialized opening.
The board thickness and wrapping construction also occupy space around the product. Corners, walls, turn-ins, lid overlap, and internal components need to be considered when converting product measurements into a production-ready box.
For premium packaging projects, Rigid Box Size and Fit should be considered together with the product dimensions, because the final box needs to balance internal space with the desired presentation.
The lid needs enough room to close without pressing against the shoes. This is especially important when the footwear has a high collar, thick sole, raised logo, decoration, or tissue wrapping.
Close the box with the actual packed shoes inside and check whether the lid moves smoothly. If the lid catches on the product, the internal height or arrangement may need to be adjusted.
For a rigid box with a separate lid, also check the relationship between the lid depth and the base height. The lid should align properly with the base without creating unnecessary pressure on the contents.
Once length, width, height, pair arrangement, and packing materials have been measured, place the shoes inside a temporary container or sample box with similar proportions. This can help you see whether the planned space is practical.
Check whether the shoes can be loaded easily, whether they remain in the intended position, and whether the lid can close without interference. Also check whether there is excessive empty space around the footwear.
The goal is not simply to make the smallest possible box. The goal is to create a practical fit that supports loading, product access, presentation, and the intended packaging experience.
If your footwear range includes several sizes, do not assume that one box dimension will work equally well for every size. Larger shoes may require greater length, width, or height, while smaller products may fit more efficiently in a smaller structure.
Create a measurement sheet for each major size group. Record the shoe dimensions, pair arrangement, packing materials, internal clearance, and final approved box dimensions.
A controlled size family can help keep packaging organized while avoiding a universal box that is unnecessarily large for smaller footwear. If your business also packages other fashion accessories, Accessory Box Dimensions can be reviewed as an example of how product-specific measurements affect packaging size.
The opening style can change how much space is required around the product. A lid-and-base box may allow the shoes to be lifted directly from the base, while a drawer structure requires enough room for the tray to move through the sleeve.
If you choose a sliding structure, the internal shoe space and the tray dimensions should be calculated separately from the outer sleeve. The tray must hold the shoes while also moving smoothly inside the sleeve.
For projects using this construction, Rigid Drawer Box Dimensions should be evaluated alongside the footwear measurements and the required tray clearance.

Larger footwear, boots, shoe sets, or multiple-product presentations may require a different internal structure. A larger package should not simply scale up every dimension without considering the product arrangement and box construction.
For example, a multi-pair presentation may require additional internal divisions, while a larger shoe may need greater height because of its upper or sole profile. The internal layout should therefore be planned around the actual contents.
When a project requires substantially more interior space, Larger Rigid Box Dimensions can provide a useful structural comparison when planning a larger rigid format.
A written measurement sheet makes the packaging project easier to review and repeat. Record the product name, footwear size, length, width, height, pair arrangement, tissue requirements, accessories, internal dimensions, external dimensions, box style, insert requirements, and approved sample reference.
| Item to Record | Required Information |
|---|---|
| Product | Shoe style and product name |
| Size | Footwear size or size range |
| Length | Longest shoe measurement |
| Width | Widest shoe measurement |
| Height | Highest shoe measurement |
| Pair Layout | Side-by-side, angled, heel-to-toe, or other arrangement |
| Packing Materials | Tissue, cards, accessories, and other components |
| Internal Size | Required usable product space |
| Box Structure | Lid-and-base, drawer, or selected format |
| Sample | Approved physical sample or mockup reference |
After preparing the measurements, send the complete specification to the packaging team. Include photographs of the shoes when possible, especially if the footwear has an unusual shape or raised features that measurements alone may not explain.
The packaging team can use the information to prepare the box structure and artwork template. Review the resulting dimensions carefully and compare them with the original measurements before approving the final production version.
If your product range includes apparel as well as footwear, Product-Specific Box Measurements can also illustrate why packaging dimensions should be based on the actual packed product rather than a generic category size.
A physical sample is useful because it lets you test the dimensions with the actual shoes. Place the pair inside the sample and check the fit, loading process, lid closure, product movement, and overall presentation.
Look at the corners and edges as well. Make sure the shoe does not press against the walls and that decorative parts or raised soles do not interfere with the lid. If tissue or accessories are part of the final package, test them at the same time.
If the sample requires a change, update the specification before full production. Keeping the approved dimensions and sample together also makes repeat orders easier to manage.
One common mistake is measuring only one shoe. Another is using the footwear size number as though it were the physical length of the shoe. Shoe sizes do not provide a complete packaging specification because different designs can have different shapes and proportions.
Another problem is forgetting tissue, accessories, inserts, or product cards. These components occupy internal space and should be included when the final dimensions are established.
Using external dimensions as internal dimensions can also create a poor fit. Always identify whether measurements refer to usable interior space or the complete outside dimensions of the finished box.
Finally, do not approve the packaging based only on a flat drawing. An assembled sample can reveal problems that are difficult to notice on a screen.
Measuring rigid shoe box dimensions is easier when the process starts with the actual footwear. Measure length, width, and height first, then consider the pair arrangement, tissue, accessories, internal clearance, lid movement, and selected box structure.
The most important point is to design the packaging around the product rather than forcing the product into a predetermined box size. Accurate measurements help create a better fit, while a sample provides an opportunity to confirm that the planned dimensions work with the real shoes.
Once the measurements and packaging requirements are ready, you can discuss your custom shoe box dimensions with the packaging team and move toward a suitable box structure and production specification.
Yes. Measuring the actual shoes provides a more reliable starting point because footwear can vary in length, width, height, sole shape, and overall construction even when the products share the same size label.
Yes. Length, width, and height provide the basic measurements, but the pair arrangement, tissue, accessories, inserts, lid clearance, and internal structure should also be considered before final dimensions are approved.
Yes. Measuring both shoes helps confirm the complete pair arrangement and can reveal differences in shape, width, height, or accessories that may affect the required internal space.
Yes. The internal size determines the usable space available for the footwear. External dimensions are established afterward by accounting for board thickness, walls, wrapping materials, lid construction, and other structural components.
Yes. A physical sample allows you to place the actual shoes inside the box and check product fit, loading, clearance, lid closure, movement, and overall presentation before approving full production.